
Operating the Physio Control LUCAS 3 Automatic Chest Compression Device


The LUCAS chest compression system has been helping lifesaving teams around the world deliver high-quality, guidelines-consistent compressions, in the field, on the move and in the hospital.
The LUCAS devices have had over 12 years of research and development and is now currently in its third iteration (LUCAS 3.1). The LUCAS 3 chest compression system has improved features to facilitate maintenance and handling and allows for new insights through easy, wireless access to device data.
The LUCAS has been described as "a bridge to definitive care" as the most dangerous and crucial minutes for patients are between the onset of cardiac arrest (CA) and arriving at a hospital. Without restoring proper circulation, surviving patients often have neurological damage as a consequence of the CA (Temple and Porter, 2012).
By providing reliable oxygenation to the brain, the LUCAS seeks to reduce the potentially damning consequences of cardiac arrest and save patients.

Compression Information

Compression Frequency: 102 ± 2 compressions per minute
Compression Depth (nominal patient)
• 53 mm ± 2mm for patients with sternum height over 185mm
• 40 to 54mm for patients with sternum height less than 185mm
Device Dimensions and characteristics
Height x Width x Depth (assembled): 56 x 52 x 24cm
Height x Width x Depth (stowed in backpack): 58 x 33 x 26cm
Device weight with (no straps): 8kg
Device Storage temperature: -20ºC to + 70ºC
Device Ingress Protection Classification: IP43

The LUCAS 3 on the Stark Medical shop can be optioned upon request but come standard with:
1x Lucas 3 CPR Device (including Slim Backplate in Yellow).

LUCAS Slim Back Plate
This backplate is 50% slimmer than its predecessor, tapered edge for easier adjustment, larger contact area for stability. The device is easier clean, has additional points for attachment and can also be used with the Lucas 2 Device.
Although this device is relatively unobstructed to the view of cath lab imaging devices, we recommend purchasing an additional PCI backplate (scroll down below).
1x Lucas Hard Shell Case

The Lucas Hard Shell case is made from Polycarbonate with a moulded design that is compact, portable, durable and easy to clean. The inner workings of the case are organised with smart storage compartments for accessories such as batteries, straps and suction cups.
The shell also includes:
- Reflective Badging
- Large multi-point handles
- Large zipper grips
- Adjustable backpack straps
1x Rechargeable Lithium-ion Polymer Battery

The Lithium-Ion battery allows the LUCAS 3 to operate for approximately 45 minutes on a full charge. Although the LUCAS can be charged via the Shell Case and can also be charged during operation using a 12V charger. Having additional battery packs may be beneficial should the transport time be longer than 45min.
The Battery weighs 600 grams and has a 3300 mAh capacity with a voltage of 25.9V.
The manufacturer recommends a replacement of the battery every 3 to 4 years or after 200 uses beyond 10 minutes per use.
Charge Temperature: 0ºC to +40ºC with an optimal charging at ambient (20ºC to 25ºC).
We recommend purchasing additional accessories that may be effective emergency situations:
x 1 - 3 Additional Rechargeable Lithium-ion Polymer Batteries
x 1 PCI Carbon Fibre Back Plate

The Carbon Fibre Back Plate is a useful addition to your LUCAS unit as it is completely Radiolucent. This means the patient with device in use can be transported to the Cath Lab and placed under the scope of imaging devices without interference from the backplate.
x 1 LUCAS Battery Charging Dock

The LUCAS 3 Charging dock allows for the LUCAS Lithium-Ion Battery to be inserted directly and charged from complete depletion in approximately 2 hours (at room temperature 22ºC).
Please contact StarkMed if you would like your LUCAS device equipped with any of the above options or receive more information about additional software/hardware.

Please note the following steps in this guide are simply an overview.
Official training for users should be done with or under the supervision of a qualified professional after the device has been purchased and received.
The International Liaison Committee on Resuscitation (ILCOR) states these side effects of CPR:
“Rib fractures and other injuries are common but acceptable consequences of CPR given the alternative of death from cardiac arrest. After resuscitation, all patients should be reassessed and re-evaluated for resuscitation-related injuries.”
Apart from the above, skin abrasions, bruising and soreness of the chest are common during the use of the LUCAS Chest Compression System.
Control Panel

1) The ON/OFF button is in the top left of the Control Panel in the grey bar. Push and hold this button for one second to power up or power down the LUCAS device.
When the device powers up, it automatically does a self-test of the functions and the protective system.
When the self-test is complete, the green LED beside the ADJUST key illuminates. This takes approximately three seconds.
When you are using the LUCAS device, the very first thing you do, even before taking it out of the Carrying Case, is to press the ON/OFF button and turn the device on.
2) The orange button is the ADJUST button. It is also labelled with a “1”. When you turn the device on, it automatically enters the ADJUST mode, which is used to adjust the position of the Suction Cup.
When you push this button, you can manually move the Suction Cup up or down. To adjust the start position of the Suction Cup, manually push down the Suction Cup, extending the Piston with two fingers onto the chest of the patient, ensuring the pressure pad touches the patient’s chest.
3) Press the PAUSE button, labelled with a “2”, to lock the Piston in the Start Position.
Also, use this when you want to stop the device and temporarily pause compressions but still want to keep the Start Position of the Suction Cup.
There are two ACTIVE modes on the device:
- One is ACTIVE (continuous)
- The other is ACTIVE (30:2).
In continuous mode, the device will perform continuous compressions at
102 ± 2 compressions per minute; use this setting if the patient is intubated. The green LED next to the button for continuous mode will blink ten times per minute to alert for ventilation during ongoing compressions.
When you push the ACTIVE (30:2) button, the device will perform 30 compressions, then temporarily stop for three seconds to allow for two breaths. It will continue this cycle.
An intermittent LED in combination with an alarm signal sequence on the 28th, 29th and 30th compression will alert the operator before each ventilation pause.

Step 1. Device Retrieval.
Retrieve the LUCAS 3 unit as soon as possible in order to ensure maximum effectivity for the patient.

Step 2. Ready the device if possible.
If the users can, Turn on the unit as it is still in the Shell Case so that the LUCAS can run its pre-use calibration.

Step 3. Unload the device.
Remove device and components such as the backplate from the Shell Case.

Step 4. Positioning the backplate under the patient.
There are two suggested methods for this.
1. Rolling Method:
Minimize interruptions to manual chest compression during the preparation and application of the LUCAS chest compression system.
The users will want to lift the patient's arms either upward or over their chest.
Roll the patient's upper body to either side (imagine the foetal position) and slide the backplate underneath their body.
2. Lifting Method:
Lift the patients head and move the backplate under the neck and the shoulders.
Lift the patient by the arms and move the backplate into the correct position.
Refer to the images below to understand good positioning of the backplate for use.


You should place the backplate so that it reveals the attachment points below the armpit of the patient.
Step 5. Attaching the LUCAS 3 compression
Pull the yellow release rings once to ensure that the claw locks are open. Let go of the release rings after this has action has been performed.

Clip one side of the LUCAS 3 onto the backplate attachment.

In performing this action, it will allow the user to immediately rotate the device for an exact alignment for the opposite side of the backplate attachment.
This method is preferred over placing the LUCAS device directly over the patient and attempting to clip both attachments at once.
The device should look like this after it has been successfully attached. 
Step 6. Positioning LUCAS 3 on the chest.
Use your finger to make sure that the lower edge of the Suction cup (facing away from the chin) is immediately above the end of the sternum. If necessary, move the device into position by pulling the support legs to adjust the position.
This suction positioning is extremely important. As compression continues, the patient's chest will lose elasticity and pressure, thereby lowering their natural resting position. The function of the suction pump is to allow the chest to be pulled upwards upon the device upstroke.

Step 7. Lower the compression arm.
Lower the compression arm after the right correct position has been assumed. Simply pull down on the top of the suction cup to move the suction down.


Here are two warnings in regards to patient sizing:
Small Patient
Large Patient

Some clinicians like to mark the bottom portion of the suction cup with a permanent marker in order to recognise whether the device has moved during compression.

Step 8. Lock the Start Position and Start Compressions.
Press 2 on the control panel to lock the compression arm in place.
The device will automatically calculate the correct start position.
Press 3 (30:2) to start compression as soon as possble.

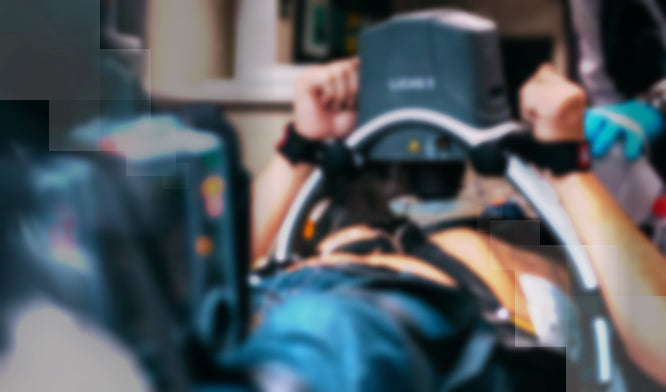
Step 9. Stabilize the patient's head and arms.
After the device has been activated, clinicians can stabilize the patient's head and arms.
Apply the stabilisation strap by placing it under the patients head. 

Take the straps and secure them on the patient's wrists such that it rests on the body of the device near the control panel.


ECG, Defibrillation & Ventilation
ECG Interference - Compressions interfere with the ECG analysis. The LUCAS 3 should be paused before the ECG analysis begins. Clinicians should seek to minimise the interruption time.
Defibrillation - Paramedics and clinicians are able to defibrillate when the LUCAS is in use. Defibrillation electrodes can be applied before and after the LUCAS is applied to the patient. Perform defibrillation according to your defibrillator manufacturer's instructions.
Make sure the surrounding individuals are clear of the patient before shocking.
Ventilation - The LED on the right side of the control panel will light up in unison with an audible signal in order to alert the operator. These occur before each ventilation pause on the 28 and 29th compressions. 
Download Larger Patient information sheet.

In recent times, the LUCAS 3 Automatic CPR system have allowed patients a second chance for life in cardiac arrest scenarios that would otherwise have resulted in death.
The links below examples of the success of the device:
"Miracle auto-CPR machines on trial in Sydney hospitals saved man's life"
See the LUCAS 3 Story on 9 News, March 2019.
"Cardiac arrest victims being saved by 'mechanical plunger' as the clinical trial progresses"
See the LUCAS 3 Story on The Daily Telegraph, June 2016.
The Lucas 2, the predecessor of the LUCAS 3 saves woman's life.
See the LUCAS 2 Story on ABC News, August 2013.
Leave a comment